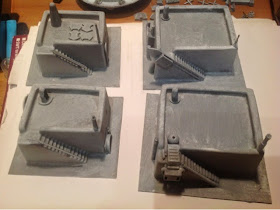
In this post, I'll run you through how I did them, start to finish:
1: Purchase buildings. These are vac-formed, £1.50 for the small ones, £1.75 for the larger.
2: Raid your bitz boxes for suitable add-ons. Halford's grey primer.
3: Drybrush white all over, then follow that with a yellow ochre wash (Americana yellow ochre, thinned)
4: Brown ink wash. (Vallejo Game Color Smokey ink). Black inks pin washed into the windows and painted into shadowy areas (Chromacryl Black).
5: Highlight/drybrush with a mix of yellow ochre and unbleached titanium (Liquitex Heavy Body unbleached titanium)
6: More brown washing with smokey ink. Further highlighting with unbleached titanium
Paints I used in this process so far
7: Yet more inking
8: And here's the selection of paint markers I used to finish off the detail. I also scoured my decal envelope and added a selection of further details. Most of the decals are from old 1:100 Macross kits, the numerals by each door are from an original land raider.
Here's Building 1. The doorway effect is black and two brown tones. The paving slabs are all done with markers. The water effects is clear granular gel with an ink wash. The aircon (?) unit is from an old USS Grissom miniature
Building 3. I wanted the buildings 'the same but different'. Turning into a bit of a motto for me, that.
This building sports an alternative roof protrusion, and an odd solar panel thing with branding in an alien script. The alien decals are from Macross Zentraedi models.
Building 5 has something industrial going on at the top of their steps. The 'No step' decal is from some aircraft kit.
Building 7 is fairly bog-standard apart from that massive unit strapped on the side. It's an old Klingon d18 that got cannibalised at some point. The rear stairs feature a raised fin for some reason.
A view of the home improvements
Compare the stairs, the hilarious new game show.
That's the finished buildings, now for the one I've started, you saw it flat packed in the second photo.
Phase one, make it, and stick more bits on.
Not sure about the green cap. I haven't stuck it yet, and I may mount something else there.
Phase 2: grey undercoat, ready for a similar treatment to the others.
Whilst we're on a Laserburn tip, some of the decals I got to complete my vehicles
So, four things off the painting table, which is looking a bit crowded at the moment.
More soon, lilliputian aficionados.


Looking really good!
ReplyDeleteThanks Stuart, I think we can get this started now.
ReplyDeleteExcellent post, thanks for mention. Would you be happy for us to share on our twitter and fb ? Thanks Jane www.amera.co.uk
ReplyDeletePlease do, a link back would be appreciated. :)
Delete