With the recent surge in interest in all things 1:1200, I fished out my polystyrene cutter and purchased a new 4.5v battery to power it. It was whilst I was doing this that I found an old bit of expanding foam that I knew would be useful some day.
 |
| The original piece of expanded foam |
So, this tutorial assumes that you've either constructed or found something useful as a base - the techniques should work the same.
As this was just a trial, I started flocking one area first. As a rule, I'd usually paint first and flock later. If you do get flock in your brush, it needs cleaning immediately.
 |
| Size 8 Sceptre brush |
The brush I used is an old size 8 'sceptre' - I believe it's nylon. I wouldn't recommend using a new one as it's going to get some wear.
 |
| Clump foliage |
What you'll need;
 |
| PVA glue |
• a suitable base to work on (in this case the expanding foam).
• PVA glue
• flock
• 'clumpy' flock for trees
• three tones of grey/brown paint
• water
• several sheets of old paper (a newspaper or magazine cut along the spine will do)
 |
| Glue on foam |
 |
| Work in progress |
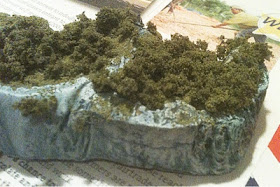
So as I said, I went about it slightly the wrong way and flocked first. A blob of PVA on the newspaper was watered down and painted onto the areas to be flocked. Once the glue was on, I dipped it into my flocking trough (a large blister pack). Shaking off the excess, I then applied more glue to the areas that had been missed, and repeated with the clump flock.
 |
| Grey cliffs and rocks |
 |
| More drybrushing |
 |
| first drybrush |
The painting aspect requires that you identify the rocky areas. Paint them all over with the darker grey shade. I used a bluey-grey. Once that's dry, the mid-grey should be drybrushed over it. Finally, a lighter drybrush with your lightest colour - in my case white - will bring out the detail.
I've been using this very cheap white for some years now. Not worth paying citadel prices when you get do much more at the art shop for your money.
 |
| Chromacryl white |

Back to the flocking. You'll still probably find 'missing bits' even after a couple of rounds of flocking. This is where the sheets of paper come in. Re-glue those areas (by dripping or painting the glue on) and pour the flock over the remaining areas. Each time you do this, turn the island over to let the unstuck bits fall off, then move it onto a new sheet, using the remainder to pour again - if you put a crease in the edge of the paper at 90 degrees, you can use it to aim the flow. The old paper can then be thrown away.

Eventually, no more bits should drop off. Your island is complete. Mine took about 20 mins - yours may take longer.
 |
| Scatter your flock and clump foliage over glue, pour off excess and repeat |
Just a final note - give that brush a clean with plenty of water again, even when you've cleaned it once. If that PVA hardens on the bristles, you can say goodbye to the brush.
Happy world-building, and please let me know if you make one of your own.
 |
| The bubbly rock from a lava flow |
 |
| Cliffs |
 |
| More cliffs |
 |
| Final drybrush with white brings out the detail |
 |
| Cliff detail |
 |
| There it is, the finished island |
 |
| Looking good |
 |
| Here's an overhead view with ships for scale. |


 Back to the flocking. You'll still probably find 'missing bits' even after a couple of rounds of flocking. This is where the sheets of paper come in. Re-glue those areas (by dripping or painting the glue on) and pour the flock over the remaining areas. Each time you do this, turn the island over to let the unstuck bits fall off, then move it onto a new sheet, using the remainder to pour again - if you put a crease in the edge of the paper at 90 degrees, you can use it to aim the flow. The old paper can then be thrown away.
  Eventually, no more bits should drop off. Your island is complete. Mine took about 20 mins - yours may take longer.


Oh now that is good... I did notice the lump of tat the other night and wondered what it was for.
ReplyDeleteIt all comes in useful... Eventually :)
DeleteHur hur hur hur hur...
ReplyDelete... 'flocking'...
hur, hur, hur, hur.
You said 'foliage'...